We started our test runs on French Palmier (蝴蝶酥), a typical western-style cookie, just to get familiar with the basic characteristics of Puff Pastry. There are a ton of online recipes for this cookie. We followed this excellent YouTube video closely, without flipping the cookies at the midpoint of baking. We then proceeded into making Chinese Shao Bing (甜燒餅, ref1), and then Portuguese Egg Tarts (葡式蛋塔, ref2, ref3). We'll try our hands on making these Chinese pastries from scratch, i.e., from making the dough, some time in the future. Will report back.
Ingredients
- Puff Pastry Sheet, 10" x 15" per sheet (for Part I, II, and III below).
- For Part I- French Palmier: 3 Tbsp of sugar thoroughly mixed with 1 tsp of Cinnamon Ground (a 9:1 ratio), and a sugar dispenser/sprinkler (optional).
- For Part II- Chinese Shao Bing: 4 Tbsp (i.e., 1/4 cup) of all purpose flour thoroughly mixed with 1 tsp of corn starch (i.e., homemade cake flour), and 4 Tbsp of Sugar. White or black sesame seeds spread into a rice bowl. Note- Homemade Cake Flour is usually made with 1 Tbsp of Corn Starch added into 1 cup of all purpose flour (1:16 ratio). Sugar water (1 Tbsp sugar fully dissolved in 1-2 Tbsp of water). A small brush. 1/4 cup of sesame seeds (raw or roasted).
- For Part III- Portuguese Egg Tarts: Half and Half 1.5 cups. Sugar 1/4 cup. 4 egg yolks. 6 tsp of all purpose flour and 1/2 tsp of corn starch (again, homemade cake flour). 20 egg tart tins.
I. French Palmier
II. Chinese Shao Bing (甜燒餅)
- Take a look at this excellent YouTube video before proceeding.
- Take out a single Puff Pastry Sheet (mine was 10" x 15"). Unfold and roll into a flat sheet. Defrost at room temperature for ~15 mins (till still-cold but pliable, back to freezer for 10-15 mins if too soft).
- Sprinkle a mix of sugar and cinnamon ground on the sheet evenly and generously. Note- Mix 3 Tbsp of sugar with 1 tsp of cinnamon ground (i.e., a 9:1 ratio), and sprinkle with a sugar dispenser/sprinkler.
- Fold 1/4 of the puff pastry sheet in from the edge toward its center (use the long side of the rectangle, as shown in the video). Fold twice from one side and you reach the center line of the sheet. Repeat this process from the other side of the sheet. Note- No need to trim the edges of the sheet.
- Send the folded puff pastry sheet back to freezer for 15 minutes. Note- Cutting the sheet when it is no longer cold will collapse the edge of the sheet at cutting point, and cause the edges to Not puff up during baking.
- Crosscut the folded-up roll of Puff Pastry Sheet with 1/3”-wide cuts. Set each cut on its side on a baking pan. Spread the bottom of each cut out (to form the shape of butterfly wings). Now press down on the surface of the butterfly lightly with your thumb. Allow ~1/2" space between two pieces.
- Preheat your oven to 400-degF, and bake for 20 minuets (with no need to flip the cookies at mid-point of baking). Note- A single 10" x 15" sheet made 20 cookies). Here is the outcome from our kitchen-


- [Making the Shao Bing Filling] 4 Tbsp of all purpose flour thoroughly mixed with 1 tsp of corn starch (i.e., homemade cake flour), and 4 Tbsp of Sugar.
- Take a sheet of 10"x15" Puff Pastry out from freezer, unfold, and roll into a flat sheet. Cut the sheet into 3.33"x3" pieces while it's still frozen (no need to defrost). Now let the pieces defrost (to still-cold but pliable, ~15 mins).
- Hold one 3.33" x 3" Puff Pastry piece in your palm, and place ~1 tsp of the flour-and-sugar mix we prepared in Step 1, at the center of the 3.33" x 3" puff pastry piece. Carefully collect two opposite corners of the puff pastry piece up and squeeze together, without spilling the filling. Collect the other pair of opposite corners and the rest of the edges, to form an old-money-bag-shaped pocket (see picture). Now, close the pocket at its neck (i.e., 1/2"-3/4" below its uneven top, where the imaginary old-money-bag-string is), by squeezing 4 fingers tightly around its neck. Remove extra puff pastry dough from the neck up (with a small fruit knife or paring knife, set the extra dough aside for Step 6). Carefully re-seal the top of the pocket by squeezing the dough with your thumb and forefinger to seal any crack (If the filling leaks out during baking, the pocket won't puff up!). Now set the pocket on a board up side down (the now-closed pocket-opening should be facing downward). Note- See the 2nd half of this excellent YouTube video for more info on how to do this step.

- Press a single pocket flat gently, with your palm, then with a rolling pin, roll the pocket gently into a flat round, or a flat oval (ellipse). Note-Do not press the rolling pin too hard or roll it over the edge of the pocket. We try not to push the inside filling too hard to break the pocket.
- Brush sugar water on the top side of the now-flattened pocket. Then press the top side into a plate of sesame seeds. Now set the pocket in a baking pan with ~1/2" space in between (sesame side up).
- Repeat Step 3-5 for all the 3.33" x 3" Puff Pastry pieces. Bunch 4-5 extra puff pastry dough pieces together into a ball (i.e., the extra dough cut out in Step 3). Press the ball flat with your palm, then roll into a 3"-diameter round flat, place 1 tsp of filling in, and repeat the relevant parts of Step 3-5.
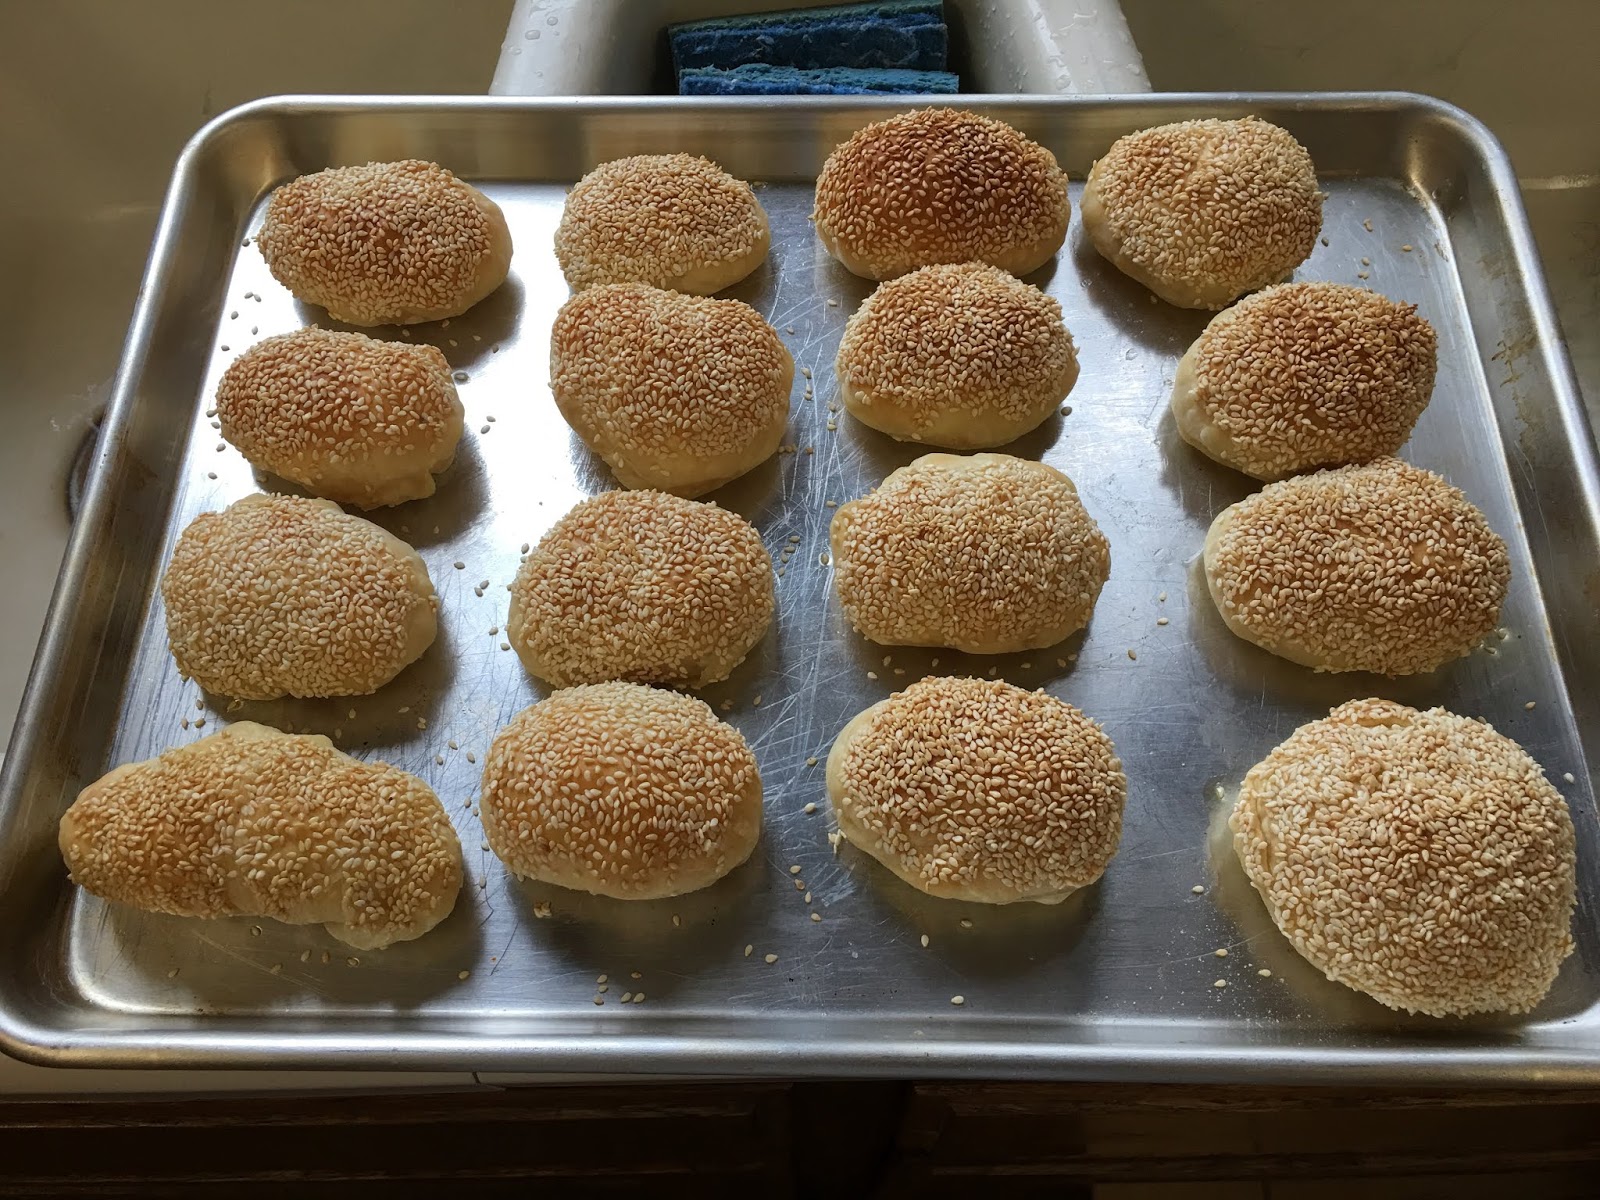
- Preheat your oven to 400-degF. Bake till the top of the pockets are golden brown (22-25 minutes). Here is the outcome from our kitchen-

III. Portuguese Egg Tarts (葡式蛋塔)
- [Making Egg Tart Filling] Add 1.5 cups of Half and Half and 1/4 cup of sugar into a 2-cup glass measuring cup. Stir and mix, and microwave for 60 seconds, stir and mix again. In a small mixing bowl, whisk 4 egg yolks and add the mix of 6 tsp of all purpose flour and 1/2 tsp of corn starch (i.e., homemade cake flour), whisk again. Pour the Half and Half mixture into the Egg Yolk mixture. Whisk, and sift through a strainer twice.
- Defrost 10" x 15" Puff Pastry Sheet (till still-old but pliable). Roll up length-wise into a 15”-long log. Leave it in freezer for 15 minuets, and cross-cut into 1/2”-wide pieces. Set each piece on its side on bread rolling board sprinkled with flour. Note- We ended up with 20 pieces, with allowance for cut loss and inaccuracy. Note- On my next try, will cut a frozen piece of 10"x15" puff pastry sheet into 3.33"x3.75" pieces, then defrost. Fit each small piece into a egg tart tin using the same method as fitting a pie crust into a pie pan. Bake at 400-degF for 5-7 minutes. Jump to step 5 (to fill each tin with Egg Tart Filling up to 80% capacity max), Bake for another 18-20 minutes.
- Flatten a Puff Pastry piece that is cut out in Step 2 by pressing with thumb first and palm next, or with a rolling pin, from its center out into the size of the top opening of a tart tin.

- Fit the flattened piece of puff pastry into a tart tin along its top edge, then press the piece into the bottom of the tart tin with one thumb and forefinger still holding the edge of the puff pastry piece, and the thumb and forefinger of the other hand pressing down into the bottom. Turn the tart tin around, press and fit the flattened puff pastry piece tightly into the tart tin. Make sure you have~10% over the tart tin edge (see picture, excerpted from ref2). Note- Press the bottom thin and tight, freeze if not use immediately. Note- Egg tart filling overflowed over the puff pastry wall during baking will make the puff pastry skin stuck to the tart tin, and hard to remove cleanly. That is the main reason we fit the puff pastry over the tart tin edge, later fill the tart tin up to 80% of its full capacity.
- Fill each tart tin with the Egg Tart Filling prepared in Step 1, up to 80% of the tart tin capacity. See Note above for reason not to overfill.
- Preheat the oven to 400-degF. Bake on middle rack till the Egg Tart Filling turns golden with brown sugar burn marks, ~25 mins. Note- The puff pastry skin seemed to retreat downward first, and then swelled up along with its filling. Here is the outcome from our kitchen-


No comments:
Post a Comment