Wednesday, December 20, 2017

Sweet Almond Cream (杏仁露)

Traditional Chinese desserts often come in liquid form.  In the ever so popular Phoenix Bakery (鳳城) in Southern California, dessert soups (甜湯) are a category of its own.  Here is our attempt to make a well-liked soupy dessert. Compared with the traditional method of: (1) making glutinous rice paste out of rice grains, and (2) adding the genuine almond taste from raw almonds, the method we use here is very simple (as derived from the making of Seaweed Almond Crisps previously), yet the results are authentic and delicious.

Ingredients
  1. Glutinous rice flour (糯米粉)- 2/3 cup (see the green package on the right-hand side of the picture below for product package). Using regular Rice Flour (the left-hand-side package in the picture) works almost equally well (yielding slightly less-dense paste in Step 3 below).
  2. Pure Almond Extract- 1/4 tsp.
  3. Sugar, 1 Tbsp.
Method
  1. Heat 1 cup of water in microwave for 45 seconds. Note- I use a 2-cup glass measuring cup, which is microwave safe and large enough for mixing water and glutinous rice flour.
  2. Add 2/3 cup of glutinous rice flour (糯米粉) into the warm water, and stir (with a large spoon) till the rice flour is fully dissolved and there is no clump left in the mixture.  Add 1 Tbsp of sugar into the mixture, and stir.
  3. Heat the mixture in the microwave again for another 45 seconds. By now, the rice flour mixture should have curdled into paste form. Stir (with a large spoon) till the paste is smooth and thick. If the mixture is too thick, add 1/4 - 1/2 cup of water gradually as you stir, to create heavy-cream-like texture, hence the name Almond Cream.
  4. Add 1/4 tsp of pure almond extract into the paste. Stir and mix thoroughly.
  5. Chill in the fridge and serve cold, or warm (by heating the serving size of ~3/4 cup in microwave for 15 seconds). Here is the outcome from our kitchen (using a 6-oz, i.e. 3/4 cup, glass custard cup).

Seaweed Almond Crisps (海苔杏仁酥/海苔薄燒)

This snack seems quite popular lately. Nowadays it's even available in some Costco stores in California.  Structurally we're making a sandwich here, by embedding almond slices and sesame seeds in between two seaweed sheets. We rely on glutinous rice flour paste to "glue" the dry and brittle seaweed sheets together. It's interesting to note that glutinous rice flour is easily dissolved in water, but the liquid mixture curdles below 212-degF, i.e., water's boiling point. As a result, temperature control is relatively important in making the "glue", in Step 1-3 below, a thing we learned in making Cantonese White Sugar Cake (白糖糕).

Ingredients
  1. Seaweed  sheets (aka. Sushi Nori sheets)- 4 sheets (each ~7" x 8" in size, available from any Chinese or Japanese market, see picture to the right for product package).
  2. Glutinous rice flour (糯米粉)- 1/3 cup (see the green package on the right-hand side of the picture below for product package)
  3. Almond Slices- 2 oz (roast till lightly golden, on a frying pan on stove at medium heat, ~5 minutes, stir constantly). Note- 2 oz for a batch of two seaweed sandwiches.
  4. Sesame Seeds- 1 oz (roast till lightly golden, separately, on a frying pan on stove at medium heat, ~5 minutes, stir constantly).  Note- 1 oz for a batch of two seaweed sandwiches.
  5. Sugar- 1.5 tsp, Salt- 1/8 tsp (for making glutinous rice paste).
Method
  1. Heat 1/2 cup of water in microwave for 20 seconds. Note- A 2-cup glass measuring cup in this step, because it is microwave safe and large enough for mixing water and glutinous rice flour.
  2. Add 1/3 cup of glutinous rice flour (糯米粉) into the warm water, and stir (with a large spoon) till the rice flour is fully dissolved and there is no clump left in the mixture.  Add 1.5 tsp of sugar and 1/8 tsp of salt into the mixture, and stir.
  3. Heat the mixture in the microwave again for another 20 seconds. By now, the rice flour mixture should have at least partially curdled into paste form (if the mixture is not thick enough, heat in microwave for another 20 seconds). Stir (with a large spoon) till the paste is smooth and thick (if the mixture is too thick, add up to 2 Tbsp of water gradually as you stir). Note- Now we have enough rice paste for 3 batches of 6 seaweed sandwiches. 
  4. Brush the rice flour paste on the top half of a single seaweed sheet while pressing your fingers along the center line of the sheet. Then brush the rice flour paste on the other half of the sheet.
  5. Place a single layer of roasted almond slices on the seaweed sheet (try not to overlay the almond slices!).
  6. Sprinkle roasted sesame seeds and 1/2 tsp of sugar on top of the almond slices.
  7. Repeat Step 4, by brushing rice flour paste on a fresh piece of seaweed sheet.  Flip the new sheet over and place it (with the rice-flour-paste-side facing down) on top of the sheet with almond slices and sesame seeds.  Now we have a sandwich of seaweed sheets, with almond slices and sesame seeds as the middle layer.
  8. Repeat Step 4-7 to make another seaweed sandwich. Now we have a batch of 2 sandwiches.
  9. Preheat oven to 250-degF.  Place the two seaweed sandwiches in a batch side by side, on a half-sheet baking pan, and place the reverse side of a cookie rack on top of both seaweed sandwiches (to press them down and to keep them flat).  Now, bake for ~35 minutes (till crispy).  Flip the two seaweed sandwiches at the halfway point, ~17 minutes.  Note- Add 5 more minutes, for two more sandwiches, i.e., ~40 minutes for four sandwiches, ~45 minutes for six.
  10. Let the seaweed sandwiches cool for 2-3 minute, and cut into your preferred serving size, with a pair of scissors, or a sharp knife. Here is the outcome from our kitchen. Note- Taste the first seaweed piece to see if  it's crispy.  If not, bake for another 5 minutes (at 250-degF).  

Saturday, August 5, 2017

Fish Gluten (魚麵筋)

We ordered this dish in a Shanghai restaurant in Northern California during the July 4th weekend. The direct translation for its Chinese name would be Fish-Wheat-Gluten.  Its texture was exactly the same as the "wheat gluten" often served in Shanghai restaurants, but the taste was comparatively richer and more enjoyable.  As it turns out, it's made from fish paste only, with no wheat gluten at all, and gets its name because it looks and has the taste like wheat gluten.

Ingredients
  1. Main Ingredients (I)- Fish Paste 12-oz, egg white (2), rice cooking wine (1/4 cup).
  2. Seasoning Ingredients (I)- Sugar 1 tsp, White Pepper 1/2 tsp, Five Spices 1/4 tsp, Baking Powder 2 tsp (Aluminum-free type preferred).  Note- Aluminum-free baking powder can be purchased from Trader Joe's. 
  3. Main Ingredients (II)- Silk Melons (2), Tomatoes (2 regular or 4 Roma Tomatoes), Dry Mushrooms (4-6 pieces), Wood Ears (10-12 pieces), Dry Shrimps (10-12 pieces).
  4. Seasoning Ingredients (II)- Salt (1/4 tsp). 

Method Part I. Making the Fish Balls
  1. Get a box of 12-oz fish paste from any Chinese Market.  Defrost thoroughly (24-48 hrs in the fridge), if it came in frozen form. Scoop the fish paste into a small mixing bowl.  
  2. Add 2 egg whites, 1/4 cup of rice cooking wine, and all the Seasoning Ingredients (I) above, into the mixing bowl.  Stir the mixture in a single direction (either clockwise or counter-clockwise) for 2-3 minutes, with a pair of chopsticks.  If the mixture is still thick and sticky, add 2 Tbsp of water into mixture and stir in the same direction again for a minute.  Chill the mixing bowl in the fridge for an hour or two.  Note- Fish paste contains corn starch and salt already.  No need to add corn starch or salt.
  3. Add ~2 inches in depth of vegetable oil into a medium-sized pot (6"-8" in diameter).  Turn on medium-to-high heat.  When the oil gets to medium temperature, scoop up some fish paste with a soup spoon from the mixing bowl.  Flip the fish paste between two soup spoons one time or two, and then drip a blob of fish paste slowly and carefully into the oil.  Note- To test the oil temperature, dip a single chopstick into some water, fling the chopstick up and down a few times to rid most of the water, then dip the chopstick into the oil.  If small water bubbles rise at medium speed along the chopstick from underneath the oil, the oil is at medium temperature (i.e., 325 to 375-degF).
  4. After ~60 seconds, the fish paste would come off of the bottom of the pot, even for a regular pot (NOT the non-stick kind). The fish paste blob will then float up to the surface of the oil, and expand.
  5. Continue to add the fish paste blobs into the pot (to the pots capacity).  Turn on high heat for 30-40 seconds after placing 3-4 blobs into the oil, as the cold fish paste has reduced the oil temperature from medium to low.  Fry the fish ball at medium temperature till it's golden, but not brown.  See this picture for 6 fish balls being fried.  
  6. Take the fish balls out as they turn lightly golden, and set aside.  The fish balls will shrivel as they cool down. Note- The fish balls will keep in the fridge for 3-4 days, up to a week. 
Method Part II. 
  1. Peel and rolling-cut 2 silk melons.  Cut 2 tomatoes into medium bite size. Reconstitute and slice 4-6 dry mushrooms. Reconstitute 10-12 pieces of wood ears, and hand-tear into small bite size.  Soak 10-12 pieces of dry shrimps in hot water for 30 minutes (drain water and set aside).
  2. [Medium-to-High Heat] Add 2 Tbsp of veggie oil into a flat-bottom cooking pot, turn on medium-to-high heat.  Place the dry shrimps and the sliced mushrooms into the pot and stir for 2-3 minutes.  Place the wood ears into the pot.  Stir, add 1/4 tsp of salt, and the tomatoes.  Stir for a minute or two.  
  3. Now add the silk melon into the pot.  Add 1/4 cup of water, and turn on high heat. Bring to boil and let simmer till the silk melon is almost soft (~5 minutes).  Add the now shriveled fish balls into the pot. Stir and mix thoroughly. Season to taste with salt, by tasting the soup in the pot. Bring the pot to boil, and let simmer for another 4-5 minutes.  Ladle out into a large bowl,  sprinkle sesame oil on top, and serve. Here is the outcome from our kitchen.

Tuesday, May 23, 2017

Taiwanese-style Sweet-and-Sour Cabbage & Korean-style Chive Salad (台式泡菜, 韓式涼拌韭菜)

By chance and by luck, we found a supplier of Stinky Tofu (臭豆腐) in Southern California, the Green Cube Gourmet Food, Inc, that's cited in this well-written article. When searching for online recipes to cook the stinky tofu, we learned that it's often served with a simple salad in Taiwan, hence the first recipe below. In fact, it's quite a treat to go by itself, as a salad in summer days.  In the meantime, we also learned how to prepare a popular Korean-style salad, Chive Salad (Buchu Muchim), that's often served as a side-dish in Korean restaurants, which might be a good comparative study against its Taiwanese counterpart. BTW, both salads are quick and easy to make.

I. Taiwanese-style Sweet-and-Sour Cabbage (台式泡菜)

Ingredients
  • Main Ingredients: Medium-sized Cabbage (use 1/4), Medium-sized Carrot 1
  • Seasoning: Salt- 2 tsp, Sugar- 2-4 Tbsp, White Vinegar- 2-4 Tbsp

Methodthe
  1. Cut a medium-sized cabbage (~2 lbs) into 4 quarters, cut out the core of the cabbage, and use a quarter (~0.5 lb) for this salad.  Hand-separate 1 quarter of  cabbage by holding the quarter with the palms of both hands, and pressing both ends of the quarter hard (see the first 2-3 minutes of this video for details).  Continue to hand-separate the cabbage into larger bite-sizes.  Place the cabbage pieces into a medium-sized mixing bowl.  Note- Taiwanese Cabbage from Chinese Markets might be significantly larger in size than regular cabbage, and requires more seasoning below.
  2. Peel and Julianne-slice a carrot.  Place the carrot slices into the mixing bowl.
  3. Add 2 tsp of salt into the mixing bowl.  Stir and mix.  Set aside for 20 minutes.
  4. Pour drinkable water (filtered or boiled-then-cooled-down water) into the mixing bowl, until the cabbage pieces are immersed in water.  Slush the water around for 15-20 seconds, let sit for 8-10 minuets, and drain the water from the mixing bowl.  Repeat this step until the cabbage no longer has much taste of salt.
  5. Add 2 Tbsp of sugar and 2 Tbsp of white vinegar into the mixing bowl.  Stir and mix thoroughly.  Note- We've been using 4 Tbsp of sugar and 4 Tbsp of white vinegar, w/o the need to adjust (season to taste) at the end. 
  6. Chill in the fridge overnight, or ~6 hours. Season to taste with sugar and white vinegar (1 tsp a time).  Here is the outcome from our kitchen.
II. Korean-style Chive Salad (Buchu Muchim, 韓式涼拌韭菜)

Ingredients

  • Main Ingredients: Chive- 4 cups, Green Bean Sprouts- 2 cups, Large Onion- 1
  • Seasoning: Salt- 2 tsp, Garlic- 2-3 cloves (or garlic powder- 1 tsp), Mild Hot Pepper Flakes- 2 tsp, Anchovy Fish Sauce- 1 Tbsp, Sesame Oil- 2 Tbsp, Sugar- 2 tsp, White Vinegar- 2-4 Tbsp


Method
  1. Rinse and cut ~4 cups of chive into 1" segments.  Place the chive segments into a medium-sized mixing bowl.
  2. Rinse and add ~2 cups of green bean sprouts into the mixing bowl.
  3. [Optionally,] rinse, slice, add into the mixing bowl, 1/4 large onion (or 1/2 medium-sized onion). 
  4. Add 2 tsp of salt into the mixing bowl.  Stir and mix.  Set aside for 20 minutes.
  5. Pour drinkable water (filtered or boiled-then-cooled-down water) into the mixing bowl, until the cabbage pieces are immersed in water.  Slush the water around for 15-20 seconds, and drain the water from the mixing bowl.
  6. Add 1 tsp of garlic powder (or 2-3 cloves of minced garlic), 2 tsp of Korean Hot Pepper Flakes (or any Mild Hot Pepper Powder), 2 tsp of sugar, 1 Tbsp of Anchovy Fish Sauce, 2 Tbsp of Sesame Oil. Stir and mix thoroughly. Note- No need to add salt. The fish sauce contains salt. Chive itself has strong flavors.  Need to go easy on the seasoning.
  7. Chill in the fridge overnight, or ~6 hours. Season to taste with Hot Pepper Flakes (1/4 tsp a time), Anchovy Fish Sauce (1/2 tsp a time), and sesame oil (1 tsp a time). Here is the outcome from our kitchen.

Two Taiwanese-style Thickened Soups, Xi-Lu Pork & Lean-Pork Thick Soup (西魯肉, 赤肉羹)

On an unseasonably warm day in early May in Southern California, we attended a Taiwanese Cuisine Demonstration sponsored by the Republic of China, in Taiwan. A young and talented celebrity chef, Chef Wen (溫國智), showed off 11 traditional Taiwanese dishes. Chef Wen added his personal touch to all these dishes and presented them as if each dish is an art piece!  In the coming days, we'll be trying our hands on some of the demonstrated dishes, hoping to make the recipes available in English, and the dishes a reality at home.

Xi-Lu Pork (西魯肉) is a traditional Thickened Soup (羹) from the northeastern Yi-Lan County (宜蘭)  in Taiwan. The version we describe below is easy to make, delicious, and a one-dish meal (with rice).  Two excellent YouTube videos (ChefWen-part1, ChefWen-part2, and, video2) serve as the baseline for this recipe, both provide great visual guidance even though  the videos come with Mandarin Chinese soundtracks. BTW, the word, 西 (Xi) in Xi-Lu Pork, is the sound in Taiwanese for the word, 絲 (slices), implying the fact that all ingredients in this dish are cut into slices.

On the other hand, Lean-Pork Thick Soup (赤肉羹) is a popular snack food (小吃) in Taiwan, available in a lot of the eateries and every night market.  The method of making this dish is similar to that of the Xi-Lu Pork, making this post a good place to see both dishes side by side.  Again, the Chinese word, 赤, is the transliteration from Taiwanese to Mandarin Chinese for the word, 瘦 (lean), implying the use of lean pork.  From the way these two dishes are named, we can see that these two dishes are quite native (and authentic?) Taiwanese dishes.

I. Xi-Lu Pork (西魯肉)
  1. [Prep Work-1] All ingredients are sliced- (1) 10 - 12 cups of Napa Cabbage (coarsely sliced); (2) 6-8 oz of pork loin (or, any lean pork, slice, marinate for 30 minutes with 1 Tbsp of soy sauce, 1 Tbsp of rice cooking wine and 1 Tbsp of corn starch); (3) 8-10 dry mushrooms (香菇, reconstituted in cold water for 2 hours, or in hot water for 30 minutes, then thinly sliced); (4) ~1.2 cup of bamboo shoots (筍絲, defrost, and slice); (5) ~1/4 cup of dry wood ears (木耳, reconstituted in cold water for 2 hours, knots removed, then thinly sliced). Note- Chef Wen did not use pork in his version.  Other recipes use more vegetables, such as carrots (Julianne-sliced), and enoki mushrooms (金針菇).
  2. [Prep Work-2] (1) 10-12 small dry shrimps (蝦米, soak in hot water for 30 minutes, no need to slice); (2) 6-8 cloves of garlic (minced); (3) 1-2 chunks of scallions (cut into 1" segments).
  3. In a large flat bottom cooking pot, add 4-6 Tbsp of vegetable oil, turn on medium-to-high heat. Add dry shrimps, minced garlic, and scallion segments into the pot. Stir till fragrant (2-3 minutes).  
  4. Add slices of dry mushrooms, wood ears, and bamboo shoots into the pot. Stir for 2-3 minutes. 
  5. Push all the ingredients in the pot to the side of the cooking pot, to leave an open space in the middle of the pot.  Add 2-3 Tbsp of vegetable oil, and place the sliced pork into the opening. Stir the pork slices for 2-3 minutes, then stir and mix all the ingredients in the pot together.
  6. Turn on high heat.  Add the Napa Cabbage slices into the pot.  Stir and mix.  
  7. Season with 1-2 Tbsp of soy sauce (light soy sauce preferred for its light color), 2-3 Tbsp of rice cooking wine, 1/2 tsp of salt, and 1 tsp of white pepper, and 4-6 Tbsp of fried shallots (油蔥酥).  Now, add 1 cup of chicken broth and 1 cup of water.  Cover the lid, bring to boil, and let simmer for 15 minutes. Note- As we learned from more experience later on, Napa Cabbage produces enough liquid when cooked in pot. Adding chicken broth and water in this step (and thickening the soup in Step 9) is really NOT necessary.
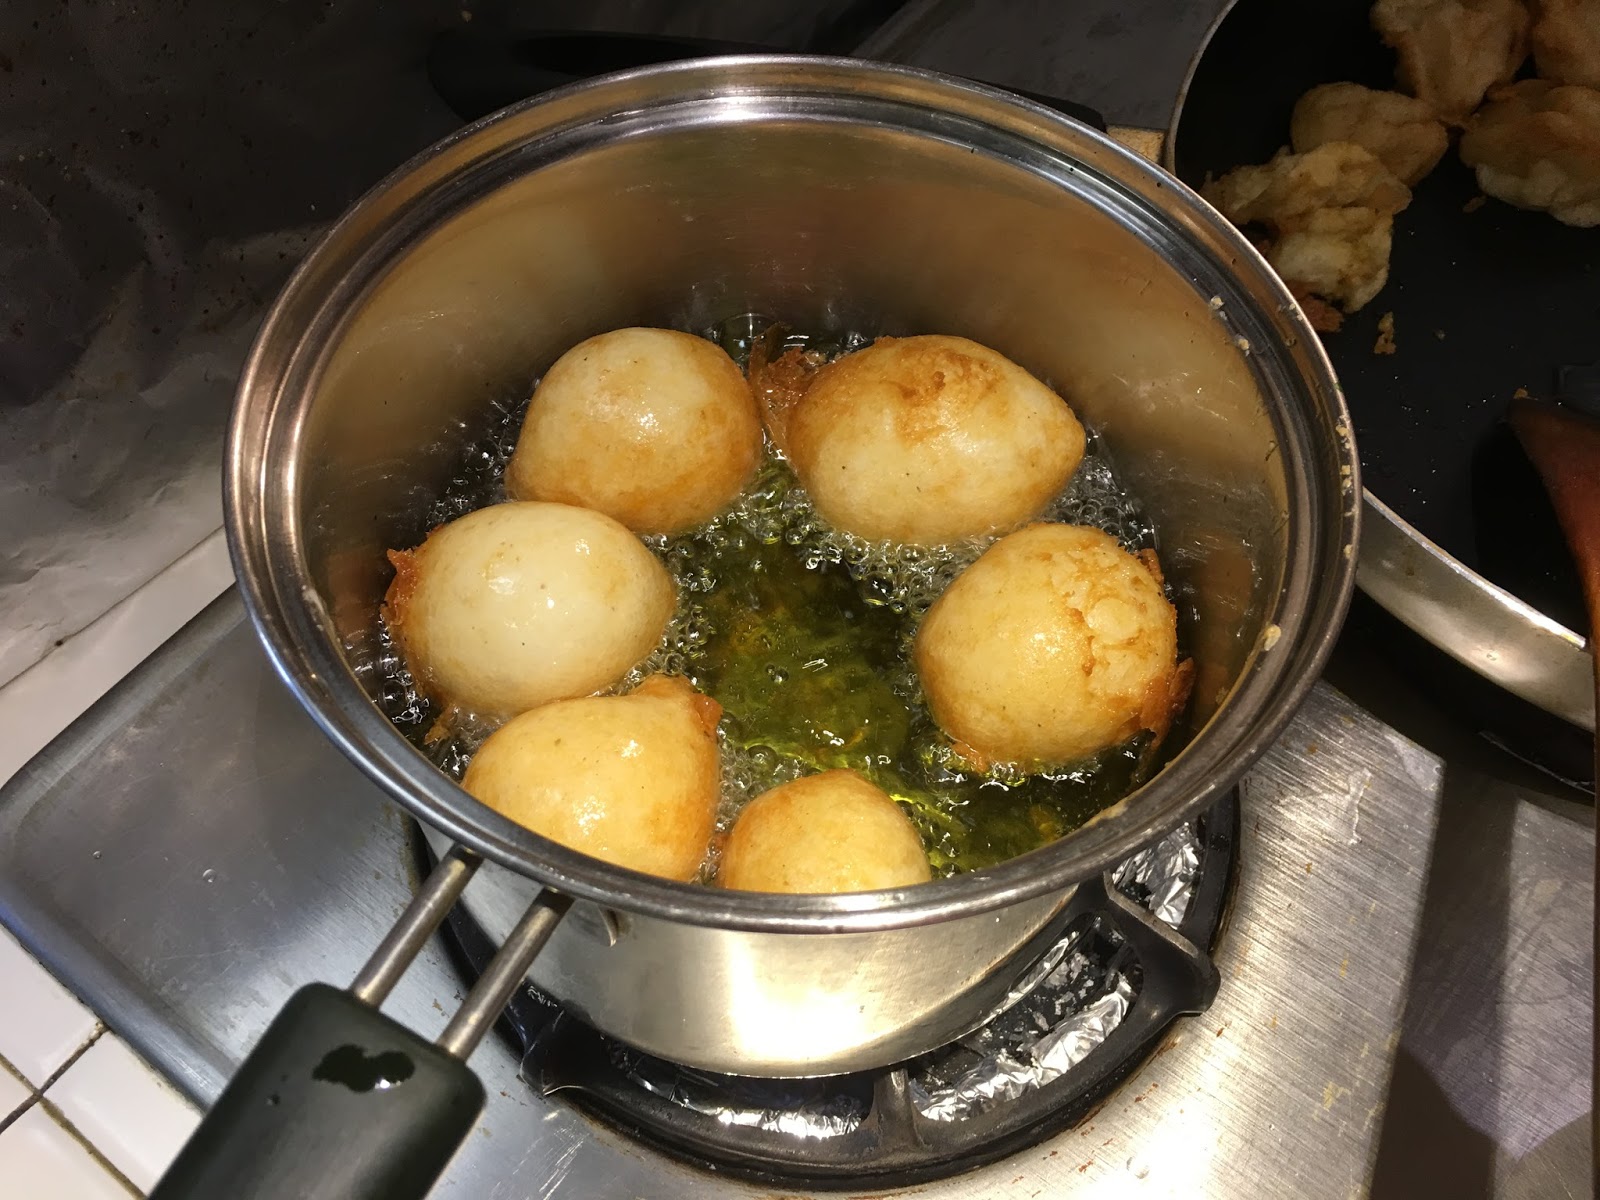
  8. [Make Egg Crispy, 蛋酥, Optional] While the Napa Cabbage soup is being cooked, whip 2 eggs in a small bowl. Add corn starch fluid (1 Tbsp of corn starch dissolved in 2 Tbsp of water) into the bowl.  Heat ~1/4" - 1/2" of vegetable oil in a frying plan till the oil is hot (i.e., a wet chopstick produces continuous bubbles under the surface of the oil when it's dipped into the oil).  Gradually and slowly pour the egg fluid into the oil with one hand, while stirring constantly with the other hand (to break the egg fluid into as many smaller egg pieces as possible).  Continue to fry the egg pieces till they are crispy and in gold brown color.  Drain oil and set aside.
  9. Continue from Step 7, thicken the soup with corn starch fluid (1 Tbsp of corn starch dissolved in 2 Tbsp of water).  Repeat the thickening process until the soup is thick enough to your liking.  Turn off heat.  Add 2 Tbsp of Black Vinegar (烏醋) and 2 Tbsp of sesame oil into the cooking pot.  Stir and mix Season to taste with salt (1/4 tsp a time), white pepper (1/2 tsp a time), black vinegar (1 tsp a time).  
  10. Take the soup out into a large serving bowl.  Top the soup with egg crispy, then place coarsely-minced cilantro or scallions on top of the egg crispy as garnish.  Ladle the soup generously on top of a bowl of cooked rice, noodle, or rice noodle (米粉), and serve.  Here is a photo of the outcome from our kitchen.  
II. Lean-Pork Thick Soup (赤肉羹)
  1. [Prep Work-1] Cut ~8 oz of pork loin (or, any lean pork) into thick slices (roughly, 1/4" thick x 1/4"- 1/2" wide x 1"- 1.5" long).  In a medium-sized mixing bowl, marinate with 1 Tbsp of soy sauce, 1 Tbsp of rice cooking wine, 1 Tbsp of corn starch, 1 tsp of black vinegar, 1 tsp of white pepper, 1 tsp of Five Spices, and 1 egg fluid (whisk the egg white and egg yolk together first). Stir and mix thoroughly.  Set aside for ~60 minutes. About 15 minutes before cooking, add 1/4 cup of Sweet Potato Powder (地瓜粉) into the mixing bowl, stir and mix thoroughly. Let the pork sit for ~5 minutes.  Add 2 Tbsp of Sweet Potato Powder into the mixing bowl again, stir and mix (to make sure the pork slices are fully coated with the Sweet Potato Powder). Note- Please take care to purchase the sweet potato powder, not the tapioca powder. Some product packages label tapioca powder with the same Chinese name (地瓜粉).
  2. [Prep Work-2] (1) Reconstitute 8-10 dry mushrooms (香菇, in cold water for 2 hours, or in hot water for 30 minutes), then cut into thin slices; (2) defrost and thinly slice ~1/2 cup of bamboo shoots (筍絲); (3) [Optionally] Reconstitute ~1/4 cup of dry wood ears (木耳)  in cold water for 2 hours, remove knots, then cut into thin slices; (4) Mince 6-8 cloves of garlic; (5) [Optionally] Crack and whisk 1 egg.
  3. In a medium-sized pot, boil ~4 cups of water, place the pork slices into the pot slice by slice.  Stir with a pair of chopsticks (to make sure the slices do not get stuck at the bottom of the pot).  Take the slices out when they float to the surface.  Set aside.  Note- use the remaining water in Step 5 below.
  4. In a flat bottom cooking pot, add ~4 Tbsp of vegetable oil, and turn on medium-to-low heat. Add the minced garlic into the pot, and cook till fragrant (1-2 minutes).  Add mushroom slices, bamboo shoots slices, and (optionally) wood ear slices, into the pot.  Turn on high heat, stir and mix for 2-3 minutes.  
  5. Add 1 can (~1.5 cups) of chicken broth and ~1.5 cups of water into the cooking pot. Note- Add another cup of water if you want more soup for this dish. 
  6. Add the pork slices from Step 3 into the cooking pot.  Bring the pot to boil, and turn the heat down to simmer.  
  7. Now, season the soup with 1/4 tsp of salt, and 1-2 Tbsp of dried bonito flakes (柴魚片). Use 1-2 Tbsp of Fried Shallots (油蔥酥) as a good, but not perfect, substitute, if bonito flakes are not available.  Let the soup simmer for 2-3 minutes.  Note- See nice web page for more info on dried bonito flakes.
  8. Thicken the soup with corn starch fluid (1 Tbsp of corn starch dissolved in 2 Tbsp of water).  Repeat the thickening process until the soup is thick enough to your liking.  [Optionally,] gradually drip the egg fluid prepared in Step 2 into the soup and stir constantly while dripping. Note- The egg fluid tends to make the thickened soup a bit murky. We often go without the egg fluid.
  9. Turn off heat.  Add 1 Tbsp of Black Vinegar (烏醋) and 1 Tbsp of sesame oil into the cooking pot.  Stir and mix  Season to taste with salt (1/4 tsp a time), white pepper (1/2 tsp a time), and black vinegar (1 tsp a time).  Garnish with minced cilantro or scallions. Serve by ladling the thick soup generously on top of a bowl of cooked rice, noodle, or rice noodle (米粉).  

Friday, May 5, 2017

Japanese Cheesecake (日式起司蛋糕)

A newly opened bakery in a nearby shopping mall is literally "selling it [the Japanese Cheesecakes] like hotcakes" :-).  Pa Pa's interest in making it at home was perked up, partly because grandma likes it a lot, partly because it tastes quite like the Italian Sponge Cake and Swiss Roll he made in a previous post.  His interest was finally set into action when we saw the price tag in the mall the other day :-).  BTW, most, if not all, Chinese bakeries sell Japanese Cheesecakes, a fact unknown to Pa Pa until recently, because buying cakes wasn't on Pa Pa's "Honey-Do List" in the past 3-4 decades :-).

Lots of recipes for Japanese Cheesecake are available online, most in English, almost all using similar methods (see link1, link2, link3 as examples).  One excellent page stands out as it comes with a great troubleshooting guide, a lifesaver for mere mortals like Pa Pa.  We also received great recipes from friends, one from Master Pastry Chef Shirley, the other from a good friend of our daughter's, Vickie. To our surprise, both recipes from our friends use cornstarch only, without adding any cake flour (unlike the online recipes cited above).  We followed this practice below, which yields silkier and smoother cake. The method used here is quite similar to that used in the previous post on Italian Sponge Cake and Swiss Roll, except for the water-bath baking at the end. 
  1. [Prep Work] Take 6 eggs and 1 pack of 8-oz cream cheese out of the fridge, and leave them in room temperature for 30 minutes. Line the bottom of an 8" (8x3 round) cake pan, or two 6" (6x3 round) cake pans, with parchment paper (lightly oil the side of the pan with shortening or vegetable oil).  Take the cream cheese out of its 8-oz package, place it in a microwave-safe medium-sized glass bowl (e.g., Anchor Hocking 7-cup Glass Bowl), heat the cream cheese in microwave for 30 seconds, whisk, heat for another 15 seconds and whisk again.  Now, separate 6 egg whites from egg yolks (place egg yolks into the glass bowl with melted cream cheese, and egg whites into the bowl of a Stand Mixer).  Note- Do NOT use springform bake pan, because it’s very hard to make the pan waterproof for water-bath-baking later in Step 7. Consult this YouTube Video for more info on separating egg whites. 
  2. Add 1/4 cup of milk, 1/4 cup of cream (or, 1/2 cup of Half and Half), 1/4 cup of veggie oil, and 1/3 cup of cornstarch, into the glass bowl with cream cheese and yolks. Whisk vigorously for 2-3 minutes (with a balloon-shaped whisk), until there is no clumps in the glass bowl. 
  3. [Whip Egg Whites to Stiff Peaks] Turn on the Stand Mixer (using a Wire Whip), at low speed (Level 2-3 out of max-10), till the egg whites start to bubble, then to foam (1-2 minutes). [Optionally, but preferably,] add 1/2 tsp of white vinegar or Cream of Tartar.  Start to gradually add 1/2 cup of sugar (1/3 cup if you're sugar-conscious :-). Now, increase speed to 8 (max-10), if you want to speed things up a bit, till the egg whites show stiff peaks (~1.5 - 2 minutes.  Stop the mixer every 30 seconds or so, to check on the stiffness of egg whites with a spoon).  Note- Whipping to Soft or Soft-to-Medium Peaks works equally well, if not better (the stiffer the peaks, the more air whipped into the egg white, the thicker the cake after baking, and the more likely for the cake surface to crack during the cooling process). Cream of tartar helps in stabilizing the whipped egg whites in the baking process. Consult this YouTube Video for more info on separating and whipping egg whites. 
  4. Scoop ~ 1/4 - 1/3 of the whipped egg white (with a spatula) into the glass bowl with cream cheese, egg yolks, and cornstarch (Step 3).  Stir and mix thoroughly (with a silicone spatula).  Note- This is to incorporate air bubbles into the egg yolk mixture, essential for the next step. 
  5. Scoop all the mixture from Step 4 into the Stand Mixer bowl with the whipped egg white.  Use a silicone spatula to gently fold the egg whites up from the bottom of the bowl, to mix the whipped egg white with the egg-yolk-cornstarch mixture. Gently fold, in broad motions, until thoroughly mixed.
  6. As part of the Prep Work in Step 1, we've lined the bottom of  an 8" cake pan, or two 6" cake pans, with parchment paper, and lightly oil the side.  Pour the batter (from Step 5) into the cake pan(s).  Gently spread the batter to the side of the pan and even the surface (with a spatula).  Shake the pan horizontally a fi iew times to further even the surface.  
  7. [Water-Bath Baking] Preheat oven to 350-degF, and boil ~1 liter (i.e., ~4 cups) of water in a teapot.  Place the circular cake pan(s) in a 9"x13" (or larger) rectangular baking pan (with at lease 2.5" in depth).  Place the 9"x13" pan along with the cake pan(s) into the oven, at the bottom rack, and carefully pour the boiling water into the rectangular pan (now, the circular cake pan(s) is sitting in a water bath).  Bake until the surface of the cake turns slightly golden (~20-25 minutes). Decrease the ovenFor  temperature to 300-degF, and bake for another 45-55 minutes (after lowering the temperature down to 300-degF).  Cover the baking pan(s) with aluminum foil once the cake surface turns golden brown (to prevent the surface from turning out too dark).  Note- For two 6" cake pans, we baked at 350-degF for 25 minutes, and 300-degF for 55 minutes.  For one 8" cake pan, 20 minutes at 350-degF and 50 minutes at 300-degF.  As the online troubleshooting guide (cited above) and other experts suggested, under-baking might be a main reason for this cake (or any cake) to deflate, and for a cake's surface to wrinkle, after cooling off.  Try not to under-bake (err on the over-baking side!).  To check if the cake is done, gently press (or tap) on the cake surface with the fleshy side of a finger (i.e., the finger pulp).  The cake is done if the cake surface bounces right back to its original position. Otherwise bake 3 more minutes and check again. This is as reliable as, if not more so than, the "inserted toothpick coming out clean" test.
  8. [Cooling down the Cake Gradually inside the Oven] Cooling down the cake inside the oven with the oven door closed for 20 minutes, and then, with the oven door ajar slightly (by inserting an oven glove between the oven door and the oven) for another 20 minutes. The cake surface might show wrinkles if it is cooled down rapidly. Take the rectangular baking pan out of the oven carefully, along with the circular cake pan(s) still sitting in the very hot water bath.  After further cooling of 15-20 minutes, take the cake pan(s) out of the water bath.  Leave the cake(s) in the fridge overnight, or 6-8 hours.  Before serving, separate the cake(s) from the side of the pan(s) with a thin knife, then flip the cake out of the cake pan(s) onto a flat plate, slowly remove the parchment paper from the bottom.  Flip the cake(s) again onto a serving plate. Cut and serve. Here is a picture of the outcome from our kitchen (with two 6" cake pans sitting in a water bath).

Wednesday, March 29, 2017

Lamplight Beef (燈影牛肉)

Another Szechuan dish! This time it's a snack!  Or, an appetizer!  This dish gets its name from the lamplight that shines through the thin beef slices.  It's not that hard to accomplish, if we use the right kind of beef :-). We use beef shank for Part I below, and beef brisket or bottom round roast for Part II. As it turns out, what we make here is more or less the Szechuan version of Chinese Beef Jerky (牛肉乾), a snack we made before.

I. Lamplight Beef Slices (燈影牛肉片)
  1. Blanch ~2 lbs of beef shanks (牛腱) for ~3 minutes.  Drain water, rinse the beef and the pot thoroughly.
  2. Immerse the beef shanks (in whole pieces) in water in a large-sized pot, add 1 tsp of salt.  Bring to boil, and let simmer till a single chopstick can poke through the thickest part of the shank smoothly (~1.5 hours). 
  3. Take the shanks out, drain fluid, and let sit in fridge over night.
  4. [Prepare the Sauce] Mince 2-3 chunks of scallions, a 1"x2" chunk of ginger, and 8-10 pieces of garlic.  In a frying pan, add 4-6 Tbsp of veggie oil, turn on low heat and add the minced scallions, ginger, and garlic into the pan.  Add 1/2 tsp of salt, 1 Tbsp of hot pepper powder (辣椒粉, more if you like it spicy hot), 1 Tbsp of Szechuan Peppercorn powder (花椒粉), 3 Tbsp of sugar into the pot, stir and mix thoroughly.  Note- If we use commercially available hot pepper oil  (辣椒油) and Szechuan Peppercorn oil (花椒油) instead of the powders, there is no need to use veggie oil in the frying pan.  
  5. While cooking the sauce at low heat, thinly slice the beef shanks.  As you slice the shank, place the slices flatly in the frying pan (still at low heat).  Now, pan fry the slices in the sauce till the slices slightly shrivel.  
  6. Place the pan-fried beef shank slices in a serving plate the way you like to present them. Chill, sprinkle roasted white sesame seeds on top, and serve. The left-side plate in the picture below shows the outcome from our kitchen.
II. Lamplight Shredded Beef (燈影牛肉絲)
  1. Blanch ~2 lbs of beef brisket or bottom round roast for ~3 minutes.  Drain water, rinse the beef and the pot thoroughly. Note- Whole Beef Brisket is available from Smart and Final in Los Angeles Area. Corned beef made of beef brisket is NOT suitable for the purpose here.
  2. Immerse the beef brisket or bottom round roast (in whole piece) in water in a large-sized pot, add 1 tsp of salt.  Bring to boil, and let simmer till a single chopstick can poke through the thickest part of the beef smoothly (~3 hours for beef brisket, ~2 hours for bottom round roast). 
  3. Take the beef out, and drain fluid.  For the beef brisket, follow the instructions in this excellent YouTube video to trim the fat (trimming the fat after 3 hours of cooking seems a manageable task).
  4. Chill the beef in fridge overnight, and then hand-shred the beef along its fiber to the thickness of 3-4 matchsticks (or toothpicks) bundled together.
  5. Line a baking pan with parchment paper, and place the shredded beef flatly on the parchment paper.  Preheat oven to 300-degF, place the baking pan in the oven, bake for 15 minutes (turning the shredded beef every 5 minutes). Note- For a dryer version of the shredded beef, use 350-degF.
  6. [Prepare the Sauce] Mince 2-3 chunks of scallions, a 1"x2" chunk of ginger, and 8-10 pieces of garlic.  In a frying pan, add 4-6 Tbsp of veggie oil, turn on low heat and add the minced scallions, ginger, and garlic into the pan.  Add 1/2 tsp of salt, 1 Tbsp of hot pepper powder (辣椒粉, more if you like it spicy hot), 1 Tbsp of Szechuan Peppercorn powder (花椒粉), 3 Tbsp of sugar into the pot, stir and mix thoroughly.  Note- If we use commercially available hot pepper oil  (辣椒油) and Szechuan Peppercorn oil (花椒油) instead of the powders, there is no need to use veggie oil in the frying pan.  
  7. Place the baked shredded beef in the sauce, stir and mix thoroughly. Take the shredded beef out by draining the sauce slightly back into the pan (pick up the shredded beef from the pan with a pair of chopsticks, shake lightly before placing into the serving plate).
  8. Chill, sprinkle roasted white sesame seeds on top, and serve. The right-side plate in the picture above shows the outcome from our kitchen.

Monday, March 6, 2017

Snowflake Chicken (雪花雞)

Believe or not, this is a Szechuan dish (四川菜). It's not spicy, it's delightful, and it's delicious!  BTW, even papa's aging and ailing mom likes this dish a lot, because the chicken meat is almost as soft as tofu!
  1. Get ~1 pound of ground chicken meat. Note- Might consider get your butcher shop to grind some boneless, skinless chicken leg (or breast) meat. 
  2. In a medium-sized mixing bowl, add 1 lb of ground chicken, 4 egg whites, 1 Tbsp of corn starch, 1 Tbsp of rice cooking wine, 1/2 tsp of salt, and 1/4 tsp of white pepper.  Stir and mix thoroughly. Set aside for 30 minutes. Before cooking, add 1 cup of chicken broth, stir and mix thoroughly. 
  3. In a flat-bottom non-stick cooking pan, add 4-6 Tbsp veggie oil. Turn on medium-high heat for a minute (the oil is not too hot yet, at this point).  
  4. [Medium-High Heat] Pour the marinated ground chicken into the cooking pan.  Stir constantly (with a spatula) till the ground chicken turns white. Cook for a couple of minutes longer. Season to taste with salt. 
  5. Garnish with minced scallions (or cilantro), or ham bits, and serve. Here is the outcome from our kitchen (with no garnish). 

Thursday, February 23, 2017

Sweet-and-sour Shredded Daikon (糖醋蘿蔔絲)

Shredded daikon is often served in its raw and unflavored form in Japanese restaurants.  As part of the Chinese cuisine, it's often used to make a cold dish and used as an appetizer.  It's super easy to make, and quite tasty and refreshing to boot.
  1. Rinse, peel, and shred (with a julienne slicer) a large daikon (1.5-2 lbs) into a medium-sized mixing bowl.  Rinse, peel, and shred (with a julienne slicer) 1-2 carrots.
  2. Add 1/2 tsp of salt into the mixing bowl,  mix thoroughly, and set aside in the fridge for 2-3 hours.  
  3. Drain water from the mixing bowl.  Taste to see if the shredded daikon is too salty for your taste.  If it is, add 1/2 cup of water into the bowl, mix thoroughly, and drain the water again (to wash off the salt).
  4. Season to taste, by starting with 2 tsp of sugar, 1 tsp of apple vinegar, and 1/4 tsp of salt (then, 1 tsp of sugar and 1/2 tsp of vinegar a time).  Chill in the fridge, and serve as a cold dish.  Note- Alternatively, season with 2 tsp of Hot Pepper Oil (辣椒油) and 1 tsp of Sichuan Peppercorn Oil (花椒油), to make a spicy hot and numbing version of this dish (麻辣蘿蔔絲). Here is the outcome from our kitchen.

Sunday, January 15, 2017

Galbi Jjim, Korean-style Braised Beef Short Ribs (韓式牛小排)

When all the kids came home for Christmas, we had lots of fun, esp. when we enjoyed good food together, at home, or in restaurants.  One evening, we decided to go out for Korean food.  We ended up in an excellent restaurant famous for Galbi Jjim, i.e., Korean-style Braised Beef Short Ribs (韓式牛小排).  It was so good I'd like to have it regularly (better learn to make it at home, I guess, if possible:-).  The Galbi Jjim recipe below is a filtered combination of two excellent online recipes (Maangchi's and Kimchimeri's, both in English), with adjustments to: the timing for adding the veggies into the pot, the length of cooking the ribs, and the selection of veggies (based on what we had in the restaurant).  The outcome in our kitchen was quite satisfactory.
  1. [Prepare the ribs] Soak ~2 lbs of beef short ribs in water for 30 minutes, blanch the ribs for 3-4 minutes, then rinse the ribs thoroughly. Trim excess fat off of the ribs (if any), and set aside. Note- Beef short ribs are available from most, if not all, of the regular supermarkets, but not from the Chinese markets.  I found them in Vons, Sprouts, and Costco, in Southern California.
  2. In a flat bottom cooking pot (or a Dutch oven), add 6-8 cloves of garlic (minced), and 1 onion (coarsely chopped). Add the thoroughly rinsed beef short ribs into the pot. Season with 4Tbsp of soy sauce, 4 Tbsp of rice cooking wine, 2 Tbsp brown sugar, 1/2 tsp salt, and 1/2 tsp black pepper. 
  3. [Cook for 30 minutes] Add enough water to immerse the ribs in the pot. Bring to boil and let simmer for 30 minutes.
  4. [Cook for 60 minutes] Now, add 2-4 Tbsp of corn syrup (or honey), and 2-4 Tbsp seasoned soybean paste (with no spicy-hot pepper), or [optional] 2-4 Tbsp of Korean fermented hot pepper paste, if you like it spicy.  Let simmer for another 60 minutes. Now, season to taste with salt, pepper, corn syrup, and the optional Korean fermented hot pepper paste, by tasting the sauce in the pot.  Note- Korean fermented hot pepper paste can be found in any Chinese market.  See picture to the right for product package.  Also, by now the ribs should be soft and juicy. If not so, continue to simmer for up to 90 minutes (Check every 30 minutes, on water level and meat readiness; BTW, this might be a sign of questionable meat quality).
  5. [Optional] Prepare, cook, drain fluid, and set aside half a pack (6-8 oz) of cylinder-shaped Korean Sticky Rice Cake.  Note- Korean Sticky Rice Cake (cylinder shaped) is available from any Korean market, and some Chinese markets.  Follow the instructions on the package for cooking. For frozen vacuum-packed rice cakes, soak in water for 10-15 minutes, and cook in boiling water till soft.  Set aside for Step 7 now.  Store the cooked rice cake pieces in a mid-sized bowl, add 1-2 tsp of veggie oil (or some sauce from Step 4), then stir and mix the pieces to prevent the pieces from getting stuck together.
  6. [Add Veggie #1] Add large chunks (1" cubes, or larger) of 2-3 carrots, and let simmer for 10 minutes (5 minutes for medium-sized chunks, i.e., 1/2"-3/4" cubes).  
  7. [Add Veggie #2] Add large chunks (1" cubes, or larger) of 2 large potatoes, and let simmer till both the potatoes, and carrots are soft (~30 minutes total for large chunks, ~20 minutes total for medium-sized chunks, 1/2"-3/4" cubes).  Add Korean Sticky Rice Cake prepared in Step 5 and mix thoroughly.  Note- If you choose to add radish, the Chinese radish (aka daikon) should be added along with the carrots (in Step 6), whereas the Korean radish should be added in Step 7, along with the potatoes.  
  8. By now, the meat on the ribs should be easily (and smoothly) poked through by a single chopstick (known as the Poke-Through Test).  Serve with white rice.  Ladle sauce on top of the ribs and veggies. Garnish with minced green onions.  Here is the outcome from our kitchen.